Guide to Highlighters: Your Key to a Radiant Glow
Bolver CosmeticsHighlighters are designed to illuminate specific features and give the skin a radiant, healthy, and youthful glow. They are typically applied to the high points of the face where light naturally hits, such as the cheekbones, the bridge of the nose, the brow bone, the Cupid’s bow, and the inner corners of the eyes.
Essential Types of Face Highlighters
Highlighters come in several main formulas, each with unique characteristics to suit different skin needs and makeup preferences:
Liquid Highlighter A versatile and flexible option that can provide a soft, natural glow or be built up for more intense radiance. Its lightweight texture blends effortlessly, making it perfect for achieving a dewy and luminous look.
Powder Highlighter Highly popular for delivering intense pigment and long-lasting wear. It is the best choice for special occasions that require makeup to stay put for hours. It is usually applied with a brush, though some types can be patted on with fingers for a quick touch-up.
Cream Highlighter Features a buildable formula that melts seamlessly into the skin for a soft, "lit-from-within" glow. This type is ideal for fans of the "no-makeup" makeup look.
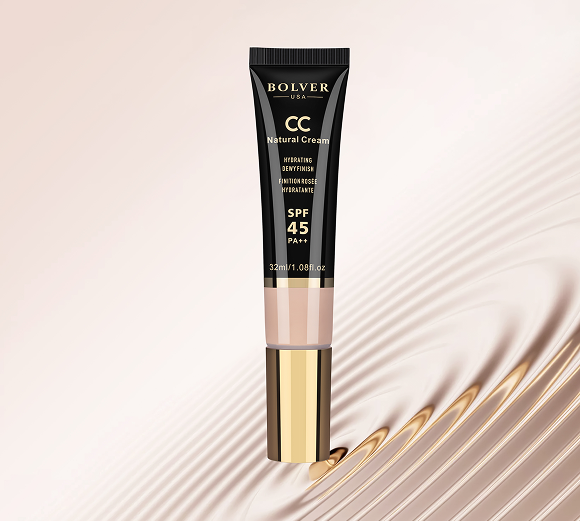
Stick Highlighter An excellent choice for beginners and those who prefer a direct, easy application. Its practical design makes it portable and perfect for quick on-the-go touch-ups, allowing you to blend with ease without needing extra tools.
The Difference Between Highlighter and Bronzer

Bronzer and highlighter play opposite yet complementary roles in makeup, differing in purpose, finish, and placement:
Purpose and Effect
- Bronzer: Used to mimic a natural sun-kissed glow, adding warmth and depth to the face while helping to sculpt and define features.
- Highlighter: Designed to attract light to specific areas, accentuating the features and giving the skin a radiant, dewy, and illuminated appearance.
The Finish
- Bronzer: Usually comes in a Matte or Satin finish.
- Highlighter: Mostly Shimmery or Iridescent.
Placement
- Bronzer: Applied where the sun naturally hits to add warmth and definition, such as the forehead, cheekbones, and jawline.
- Highlighter: Applied to the "high points" of the face to catch the light, such as the cheekbones, brow bone, bridge of the nose, and Cupid's bow.
Choosing the Right Shade
- Bronzer: It is recommended to choose a shade one to two tones darker than your skin for a natural, warm look.
- Highlighter: Selected based on what complements your skin tone; such as champagne and pearl shades for fair skin, gold for medium skin, and bronze or deep gold for dark skin.
Can they be used together? Definitely! Combining bronzer and highlighter creates a beautifully balanced look; the bronzer provides warmth and definition, while the highlighter adds the desired radiance and shine.
Top Uses of Highlighter in Makeup
To precisely illuminate your features, focus on the high points of the face, including the cheekbones, bridge of the nose, brow bone, Cupid’s bow, and the inner corners of the eyes. This draws attention to these areas and gives the skin a healthy, youthful glow.
Micro-Highlighting for High Precision For small areas like the Cupid’s bow and inner corners, we recommend these steps:
- Use a Dual-Ended Pencil: Like the Wonder Pencil Micro Highlighting Pencil, which has a matte side and a shimmery side.
- Base the Area: Apply the matte highlighter first as a base to ensure clean definition.
- Add Shine: Follow up with the shimmery side to control the level of radiance in those delicate spots.
How to Apply Highlighter Like a Pro
For beginners, follow these straightforward tips for a smooth, professional finish:
- The Golden Rule: Remember that "less is more." Avoid over-applying to maintain a natural look.
- Correct Placement: Highlighter should be placed above your blush, focusing on the prominent points of the face.
- Blending Textures: Apply a powder highlighter first, immediately followed by a cream highlighter. This step helps the textures melt together and blend perfectly into the skin.
-
Desired Intensity: Opt for a soft "low-light" effect and avoid "floodlighting" that can look artificial or exaggerated. You can achieve this using hybrid products that combine powder and cream formulas.
Read about: Face Sculpting and Feature Enhancement (Precision Highlighting)
Choosing the Right Highlighter for Your Style
Your choice depends on your facial structure, skin elasticity, and texture.
Selection Based on Age and Skin Condition If you have mature skin, choose finely milled highlighters and avoid chunky glitters that emphasize imperfections. If you are over 35 or 40, avoid placing highlighter near smile lines, under the brow bone, or on areas with large pores, as light-reflecting products make these more visible. Instead, focus on naturally taut areas like the very top of the cheekbones.
Selection Based on Face Shape
- Defined Features: If you have prominent cheekbones and taut skin, applying highlighter to the highest points and the sides of the eyes creates beautiful light reflections with every turn.
- Expressive Faces: If your face is very mobile when you talk, find the "static" areas (often the center of the cheeks) and apply highlighter there to avoid highlighting expression lines.
- Full or Soft Faces: To avoid a puffy look, smile and apply the highlighter slightly lower than the highest point of the "apple" of the cheek to create a play of light without drawing attention to fullness.
- For a Slimming Effect: Use a liquid or stick highlighter and apply it within the cheekbone area for a contoured, sculpted look.
Pro Texture Tip: Always avoid applying highlighter over acne or textured skin, as it will only highlight them further. For a brightened effect without shimmer, you can simply use a concealer one shade lighter than your skin.
Compact Powder vs. Stick Highlighter
Application and Blending The Stick Highlighter is quick and easy, blending simply with fingers or a brush perfect for beginners and busy lifestyles. The Powder Highlighter requires a brush for precision and is better for those who enjoy taking their time to build up the color gradually.
Finish and Longevity
The Stick provides a more intense, dewy, and natural finish, though it may have less staying power unless set with a spray. The Powder offers a more subtle, natural finish and excels in longevity, staying in place for hours without fading.
Skin Type Suitability
The Stick has a hydrating formula ideal for dry or combination skin. The Powder is the perfect choice for oily skin, as it helps control shine and oils and is less likely to clog pores.
Price and Value
Sticks are available at various price points, including excellent drugstore options. Powder highlighters tend to be slightly more expensive because the concentrated formula lasts a very long time, though budget-friendly options exist.
The Ideal Highlighter Brush
The right brush depends on the area you want to illuminate:
- Small Fluffy Brushes: Best for a sheer, light application.
- Fan Brushes: Perfect for a soft touch over specific areas without picking up too much product.
- Tapered Brushes: Provide high precision for cheekbones, the nose, and the Cupid’s bow.
- Pointed Brushes: The best choice for very small areas like the inner corners of the eyes.
- Duo Fiber Brushes: Great for tapping on cream highlighters.
Final Pro Tip: When using precision brushes, use a patting motion instead of dragging the brush across your face. Always ensure the bristles are soft to avoid irritating the skin.
We recommend the 'Bolver' makeup brush set to help you choose the perfect tools for your needs.